Using the History feature
The History feature lets you create and manage different versions of your project. You can view, download and compare project versions, previously deleted files can be restored, and content added by collaborators can be seen at a glance.
Using the full History feature
Full Project History is a premium feature. Overleaf premium features are available to participants in Overleaf Commons, members of group subscriptions, and owners of individual subscriptions. For users on our free plan, the History panel will show edits made in the last 24 hours. If you need history from more than 24 hours ago, or if you’d like to test-drive the full History feature as well as other premium features, you can start a free trial here.
Only the project owner needs to be on a premium subscription in order for them and any collaborators to access the full history.
How to access a project’s history
Click on History, located above the preview panel, to access the History feature. You can then select:
- All history to view all available history versions.
- Labels to access the list of labels you have created.
How to return to editing mode
To exit the History mode and return to normal editing mode, just click on History again.
What happens to the history if you copy a project?
A copied project starts with a completely new, fresh history—the original project’s history is not copied to the new project.
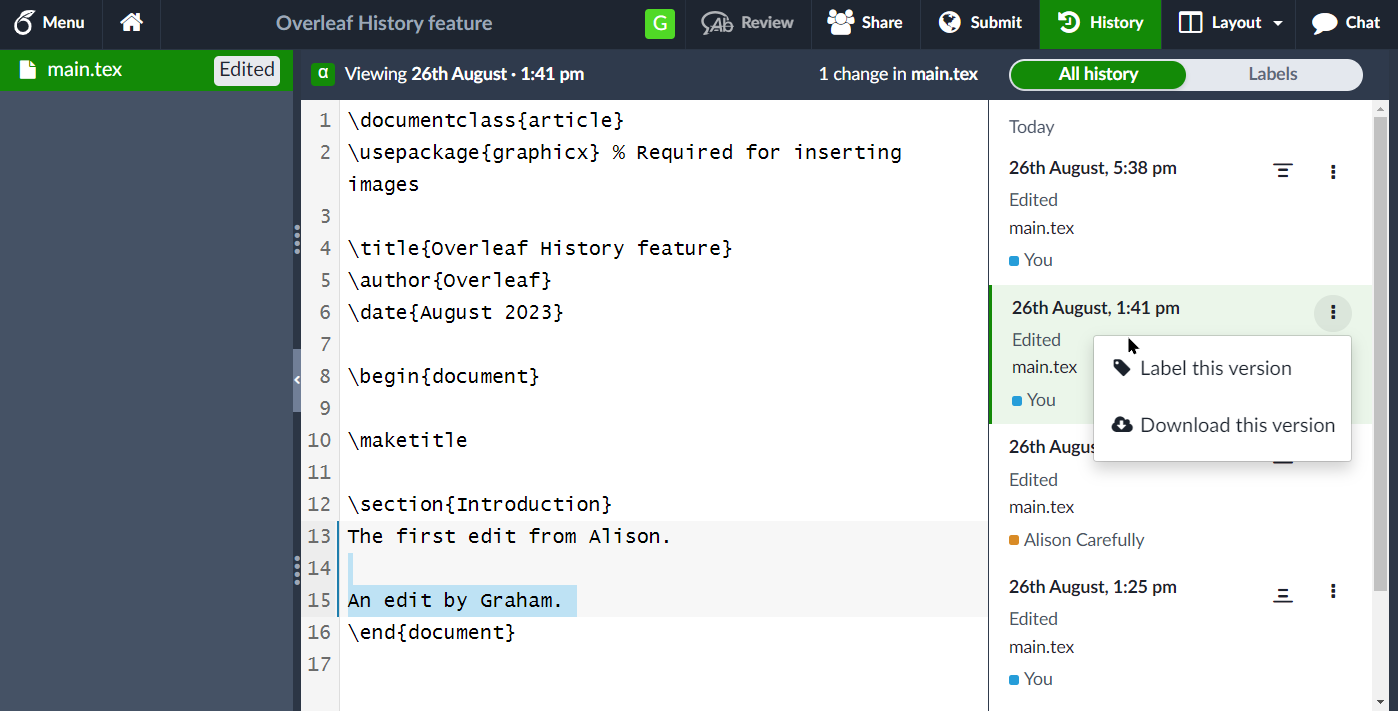
How to label or download a project version
To label or download a project version you need to:
- Switch to the All history view.
- Select the three-dot menu
 to access the actions Label this version and Download this version.
How to label a project version
Follow these steps to label a project version:
- Switch to the All history view.
- Select the three-dot menu on the version you wish to label.
- Choose Label this version.
- Type the desired label into the popup window and select Add label.

Note: You can attach multiple lablels to each project version.
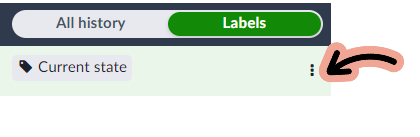
How to label the current version of a project
The current version of a project is labelled Current state. Follows these steps to edit that label:
- Select the Labels tab of the History pane.
- Select the three-dot menu .
- Choose Label this version.
- Type the desired label into the popup window and select Add label.
How to download a project version
Follow these steps to download a project version:
- Switch to the All history view (or the Labels view).
- Select the three-dot menu on the version you want to download.
- Choose Download this version.
- A
.zipfile, containing your project files, is generated and downloaded to your device.
How to compare versions
To select a range of versions to compare, use the icons  ,
,  or
or  located on each project version. Noting that project versions are listed in chronological order, with the newest at the top and older versions lower down the list, these icons perform the following actions:
- : compare up to this version
- : compare from this version
- : this icon appears for versions in the middle of the current comparison range. It provides a drop-down menu offering
- Compare up to this version
- Compare from this version
The following 45-second video demonstrates how to compare project versions.
How to restore your entire project or individual project files
With a single click, you can restore your entire project—or an individual file—to a previous version, complete with comments and tracked changes.
How to restore a single file to a previous version
Follow these steps to restore a single file to a previous version. This process restores the file’s content, plus any comments and tracked changes, to the state it was in at the selected date and time.
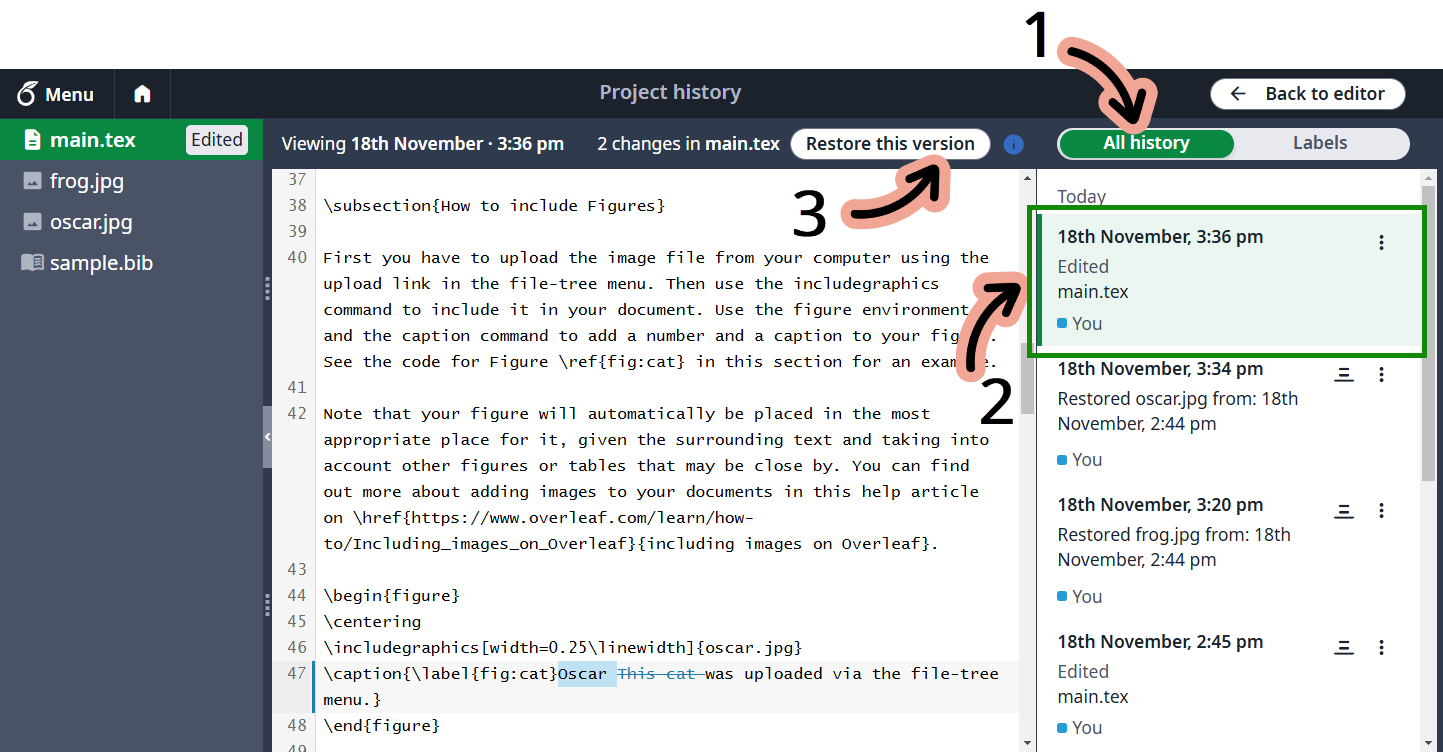
- Switch to the All history view.
- Select the file version you wish to restore.
- Select Restore this version to reinstate the file.
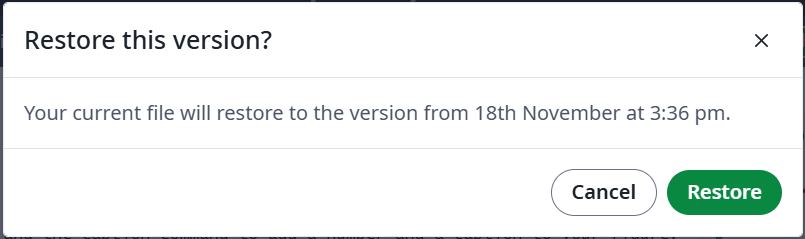
- You are asked to confirm that you want to Restore this version of the chosen file. Select Restore to confirm.
- Overleaf restores the file and switches your project out of History mode and back to editing mode.
How to recover a deleted file
Follow these steps to recover accidentally deleted files.
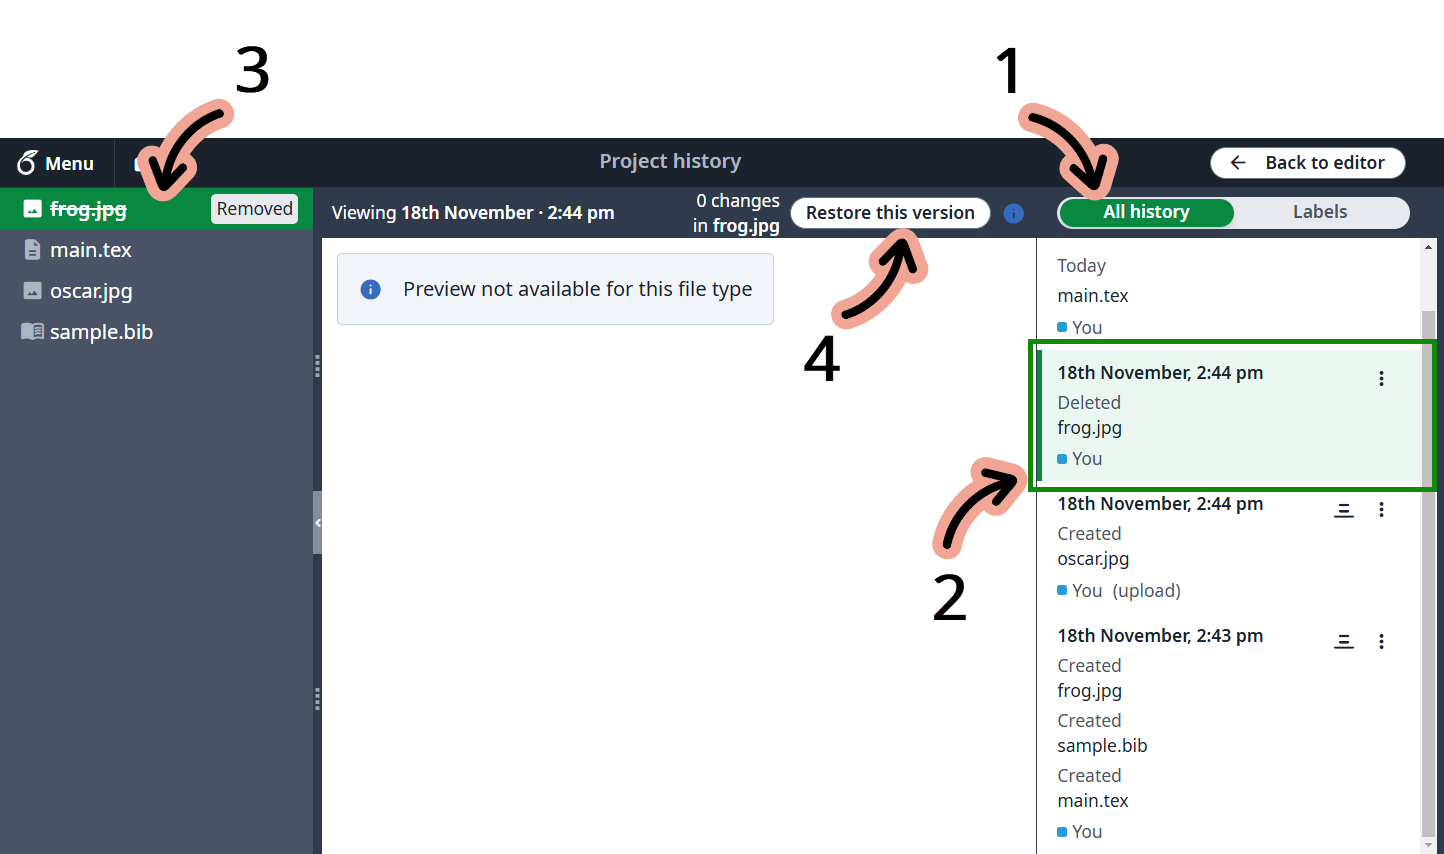
- Switch to the All history view.
- Select the project version in which the file was deleted.
- Select the deleted file from the list of project files (it will be crossed out).
- Select Restore this version to recover the file.
- You are asked to confirm that you want to Restore this version of the chosen file. Select Restore to confirm.
- Overleaf restores the file and switches your project out of History mode and back to editing mode.

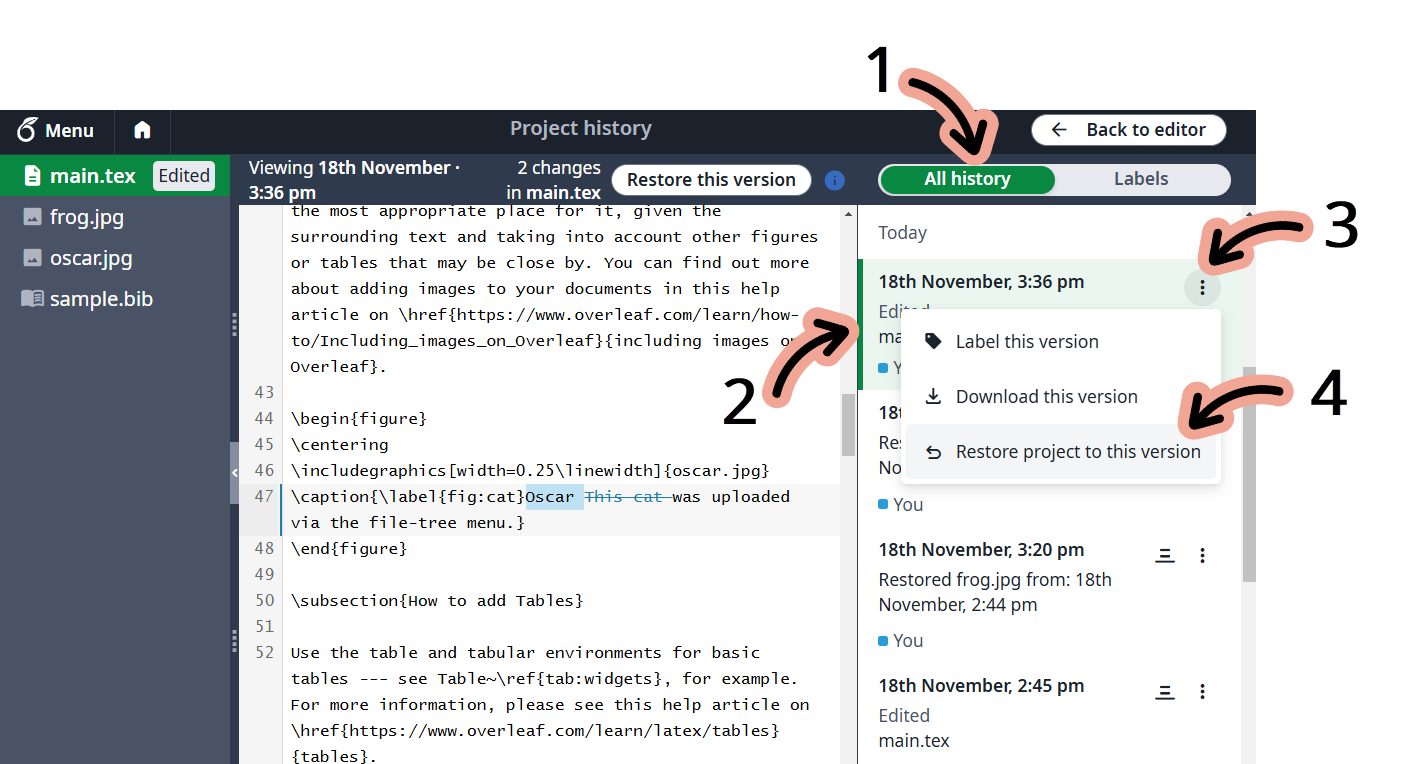
How to restore an old version of your project
Follow these steps to restore an entire project to a previous version. This process restores the projects’s content, plus any comments and tracked changes, to the state it was in at the selected date and time.
- Switch to the All history view.
- Select the project version you wish to restore.
- Select the three-dot menu ().
- Choose Restore project to this version.
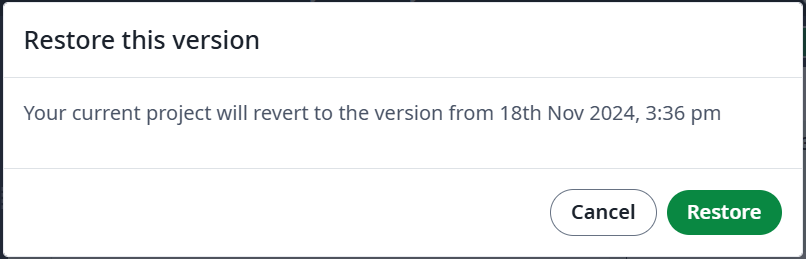
- You are asked to confirm whether you want to restore the entire project to its state at the specified time and date—including any comments and tracked changes. Select Restore to confirm.
- Overleaf restores your project, switches out of History mode and back to editing mode. You will need to select the file you want to continue editing.